Quick Guide on How to Create & Send QuickBooks Accountant’s Copy
Table of Contents
QuickBooks is an extremely popular accounting software used globally by businesses of every scale and size. It offers a plethora of features, one of which is QuickBooks Accountant Copy. As the name suggests, it helps you collaborate with your account on QuickBooks Desktop. In this article, learn how to send an accountant’s copy of QuickBooks company file.
With an Accountant’s Copy, you will be able to send your company file to your accountant without stopping your work. You will be able to import the changes made by your accountant and merge them with your changes easily.
How to Send an Accountant’s Copy of QuickBooks (Step by Step Guide)
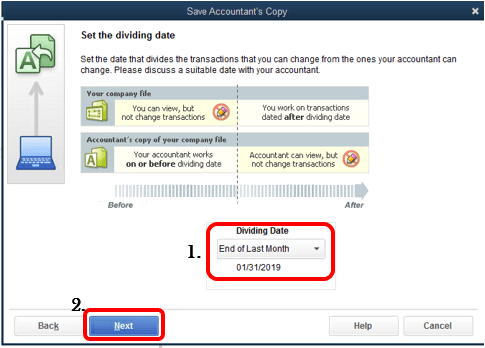
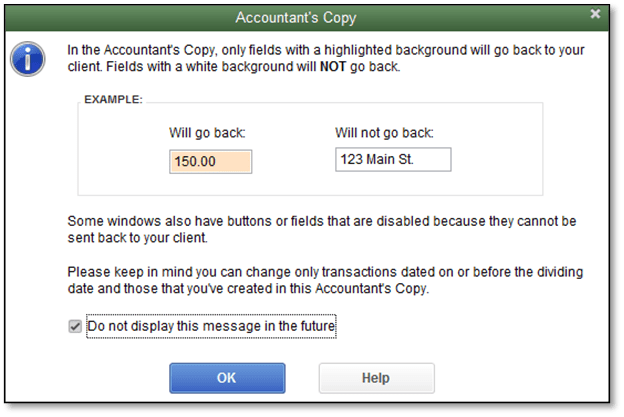
Before proceeding with the tutorial, you need to decide on a dividing date. Once you have created the Accountant’s copy, you will be able to enter transactions for dates only after the dividing date. Once you have checked the company file and decided a dividing data, follow the below-given procedure.
IMPORTANT: If you are using the QuickBooks Desktop Enterprise version, you need to turn off Advanced Inventory features before proceeding. You can turn them on after sending the Accountant’s copy.
- In QuickBooks, go to File and chose to Send Company File.
- Click Accountants Copy and chose Client Activities.
- Click Save File and select Next.
- Select Accountant’s Copy and click Next.
- Enter the desired dividing data and click Next.
You will now have an Accountant’s copy in a .qbx file format. And you are equipped with the knowledge of how to send an accountant’s copy of QuickBooks.
You can give it to your accountant on a USB flash drive or via a cloud-sharing service.
Use QuickBook’s built-in feature to Send an Accountant’s Copy
Follow these steps to use the built-in feature to send an accountant’s copy of the QuickBooks company file:
- Follow the above-given steps 1 and 2. Then, click ‘Send to Accountant’ and hit ‘Next’.
- Type the dividing data and click ‘Next.
- Enter the email address of your accountant.
- Create a password for the file (share this with your accountant).
- Click ‘Send’.
NOTE: If you had turned off the Advanced Inventory feature, you can now turn it on again.
‘Unable to Create Accountant’s Copy’ QuickBooks Error
Sometimes, while creating an accountant’s copy, you might get a QuickBooks error that does not let you do so. It might happen if your QuickBooks is not updated or if the Company file is damaged.
The error can also come up due to firewall blocking, slow internet connection, or server error. It can also occur if you use the File Transfer service in QuickBook to send the Accountant’s Copy.
How to Fix Unable to Create Accountant’s Copy Error
First, ensure you are using the latest version of the QuickBooks Desktop app.
To do this, open QuickBooks and go to Help. Choose Update QuickBooks Desktop. Then click on ‘Get Updates’. Once the update has been downloaded and installed, restart QuickBooks.
Make sure the company file does not have any special characters in its name.
If there’s a special character in the file name of your QuickBooks company file, you can simply right-click on it to rename it. Sometimes, removing special characters can help resolve the error.
If the company file size is larger than 200 MB, you might face encounter this error when sending it via the File Transfer service.
You can alternatively upload the .qbx or .qby file to a cloud storage service like OneDrive or Google Drive and share it with your accountant.
The company file is corrupted or damaged.
You may be unable to create an Accountant’s Copy if your company file is damaged. You can easily fix this problem with the QuickBooks file doctor tool. The tool can resolve various errors related to network and company files. This tool can be downloaded from the Intuit website or the QuickBooks Tool hub. If you still can’t make an Accountant’s Copy file, move on to the next solution.
You might not have security permissions.
Locate the QuickBooks company file and right-click on it. Choose the ‘Sharing and Security option and click on ‘Permission’. Now choose the ‘Add/Browse’ option and find the current user through which you are accessing the file.
Give all the read and write permissions to the user and then try creating an Accountant’s Copy again.
Conclusion – Contact QuickBooks Desktop Accounting Experts
If you are unable to create an Accountant’s Copy in QuickBooks due to this error, you should try reinstalling your QuickBooks Desktop. You can also take help from your accountant or get in touch with the QuickBooks desktop support team at +1800-994-0980.


