Setup QuickBooks Multi User Mode in QuickBooks Desktop
Table of Contents
- 1 Setup QuickBooks Multi User Mode in QuickBooks Desktop
- 2 Set up & Install QuickBooks Desktop to use Multi-user Mode
- 3 Set Folder Permissions to configure QuickBooks Multi user Mode
- 4 Install Database Server Manager to sync data in QuickBooks Multi User Mode
- 5 Set Admin Rights for QuickBooks Multi User Mode
- 6 Use the Database Server Manager to exchange data while setting up QuickBooks Multi user Mode
- 7 Turn on hosting to setup QuickBooks Multi User Mode
Do you want to share your QuickBooks Desktop with your employees or team members? Setting up a multi-user network will allow you to share QuickBooks and company files with other users on the network. In this article, learn how to setup QuickBooks multi user mode in simple steps.
When you have multiple users accessing the company files, one computer acts as the server and hosts your company files. The other computers that will be connected to your network are known as workstations, and they do not host the company files, instead, they can just access it. If there are any significant changes to be made in QuickBooks then it is mostly done on this server.
Set up & Install QuickBooks Desktop to use Multi-user Mode
To set up QuickBooks multi-user mode, most of you might have already installed QuickBooks, but if you haven’t, then you must download, install, and activate QuickBooks desktop.
Here is how you can Install QuickBooks Desktop 2023
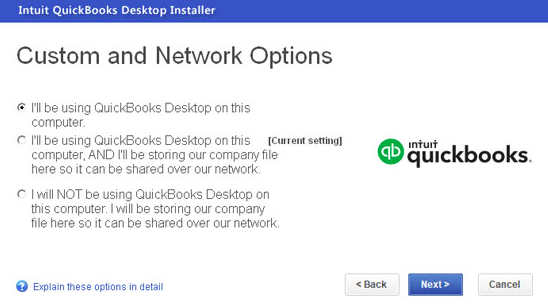
Once you download and initiate the installation process of QuickBooks, the steps are self-explanatory and very simple to follow. When you are installing QuickBooks you will be prompted for the type of install – the first is express install, and the second one is custom and network install.
This prepares QuickBooks for multiple-user. Here is how you can proceed:
- Select Custom and Network Install when prompted for the install type
- Next click on I’ll be Using QuickBooks Desktop on this Computer – you must make your selections here – if you want to keep the full version of QuickBooks, then click on And I’ll be Storing – if you just the server system to host the company files then you can click on I will NOT be using QuickBooks Desktop on this computer
- Follow the instructions as prompted to complete the installation process
It is highly recommended that you keep the company files on the local hard drive of your server computer. It is easy to share company files over the network.
Set Folder Permissions to configure QuickBooks Multi user Mode
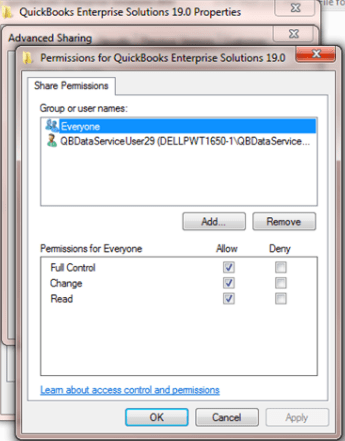
Setup folder permission from server to setup QuickBooks multi user mode.
Make sure that folder permissions are correct to enable Multi user Mode in QuickBooks Desktop:
- Click on the Windows Start menu and open File Explorer
- Right-click on the folder which has the company file
- Next click on Properties
- Click on Advanced on the Security Tab
- Click on QBDataServiceUserXX and then click on Edit
- Check if the below settings have been set to Allowed:
-
- List Folder/Read Data
- Create Files/Write Data
- Read Permissions
- Create Folders/Append Data
- Traverse Folder/Execute File
- Write Attributes
- Read Attributes
- Read Extended Attributes
- Write Extended Attributes
If your permissions are not set correctly, then follow the steps to set up QuickBooks in Multi user Mode:
- Right-click on the folder containing the company files
- Click on Properties
- Click on Security
- Next click on Edit
- Now select QBDataServiceUserXX and then click on Full Control,
- Next click on Allow
- Click on Apply and finally OK.
Install Database Server Manager to sync data in QuickBooks Multi User Mode
In step 1, where we set up QuickBooks for Custom and Network Install, it will also install QuickBooks Database Server Manager on your server. The QuickBooks Database Server Manager also lets you share company files with the other computers that share your network.
Set Admin Rights for QuickBooks Multi User Mode
The server computer must have Windows Admin Rights in the user account. The Database Server Manager should also have admin rights. This lets you control the level of access you wish to grant to the network computers when sharing your company files with them.
Use the Database Server Manager to exchange data while setting up QuickBooks Multi user Mode
- Open Windows Start Menu on the server
- Type Database in the search to open QuickBooks Database Server Manager
- Next click on the Scan Folders tab
- Click on Browse
- Select the folders that have the company files (QBW)
- Click on OK, once done and select Start Scan
After the scan, the folders are found in the “QuickBooks company files found” section. The other computers in your network will be able to access the company files in these folders.
Turn on hosting to setup QuickBooks Multi User Mode
In the final step for QuickBooks multi-user setup, you need to enable multi-user access on your server to enable sharing.
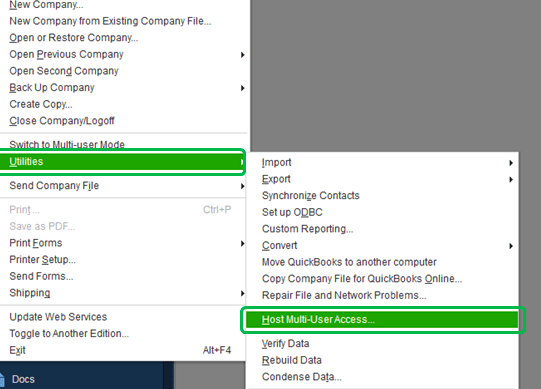
- Go to File in QuickBooks Desktop and click on Utilities
- Click on Host Multi-User Access, and to confirm the process click on Yes
You just need to sign in with your admin rights on the server and all other network computers whenever you want to access the multi-user network.
Contact QuickBooks Desktop Experts to Help you Install & Setup QuickBooks Multi User Mode
Follow the above steps to install and setup multi-user mode for QuickBooks desktop. In case you need assistance from an expert. Call QuickBooks desktop support experts at +1800-994-0980 & get instant help to setup QuickBooks multi-user mode.

