How to Fix QuickBooks Account Lookup Error 140109
Table of Contents
Modern accounting around the world heavily relies on software, and QuickBooks is the most widely used accounting software. It contains very powerful tools, but nevertheless, you could run into several issues caused by various factors. Let’s take a look at the QuickBooks error 140109 account lookup error first.
What is QuickBooks Status Code 140109 Account lookup Error?
When you run the Financial Exchange in QuickBooks Desktop Point of Sale, you have two basic account categories- Accounts Receivable (AR) and Accounts Payable (AP). If you are getting an account lookup error 140109, it is most probably caused if the Point of Sale AR or AP account is not mapped to the AP or AR accounts in Financial Exchange.
This is a common error and can be fixed very easily.
How to Fix QuickBooks Error 140109 Account Lookup Error?
The account lookup error itself mentions the correct setting that needs to be changed. You will receive the error in the following forms:
- 104109: Account lookup error: “Accounts Payable”
- 140109: Account lookup error: “Accounts Receivable”
To fix this issue, just follow these steps:
- In QuickBooks, open ‘Point of Sale’.
- Go to the ‘File’ menu and choose ‘Preferences.’
- Open ‘Company’.
- Go to ‘Financial’ and choose ‘Accounts’.
- Now map the AP and AR accounts to an account that is AP or AR-type respectively.
- Click on ‘Save’.
After performing this procedure, run Financial Exchange again. The issue should be resolved. In case the error does not resolve, the file might be corrupt or there might be another underlying issue.
Other Common QuickBooks Errors and How to Resolve Them
There are many other errors that you might come across in the QB Financial Exchange and Point of Sale. Most of these errors are related and can be fixed quickly and easily.
How to Fix QuickBooks Error 510 with Data Clean Up
If you are getting QuickBooks error code 510 while running Financial Exchange in QuickBooks, it might be a customer look-up error. It might also be caused due to data damage. There are a few solutions to fix this error in Point of Sale.
Back up your Point of Sale and Financial Exchange before performing any of these procedures.
Data Clean-Up
- Go to ‘File’, then ‘Utilities’, then select ‘Clean Up Company File Data’.
- Make sure that the ‘Compress data’ box is checked.
- A warning will pop up. Select ‘OK’.
- Optional: You can remove lists from your file by going to the Non-history documents option and also from the History documents window.
- Now select ‘Cleanup’ from the ‘Proceed with Cleanup’ window.
- Let the cleanup run. Once it’s finished, if you still receive the error, run another clean-up with the ‘Compress data’ option unchecked.
In case this solution does not work, you might have to verify & rebuild the QuickBooks company file in both headquarters as well as the Remote Store. It can be a complicated process if you are new to QuickBooks, so you should get help from the QuickBooks support team.
How to Fix QuickBooks Error 3120/3140
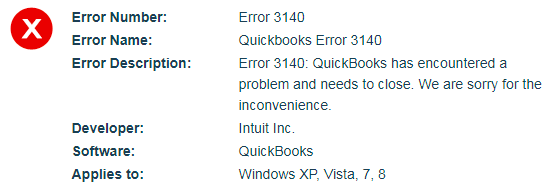
If the accounts in QuickBooks are mapped incorrectly, you might get QuickBooks error code 3140,3120 or any error from the QuickBooks error 3000 series. This is caused due to the account being invalid or the wrong type. This issue can be fixed in the following easy steps:
- Go to ‘Point of Sale’ in QuickBooks.
- Click ‘File’ and select ‘Preferences.
- Now choose ‘Company’, then ‘Financial, and click ‘Accounts’.
- There will be two tabs- Advanced and Basic. Map the accounts accurately and hit ‘Save’.
- Run QuickBooks POS Financial Exchange again and see if the error is resolved.
Tip: An unmapped account will have its name in closed square brackets.
You might also get the error code 3140 if the item account is deleted or idle. To check it and fix the issue, follow these steps:
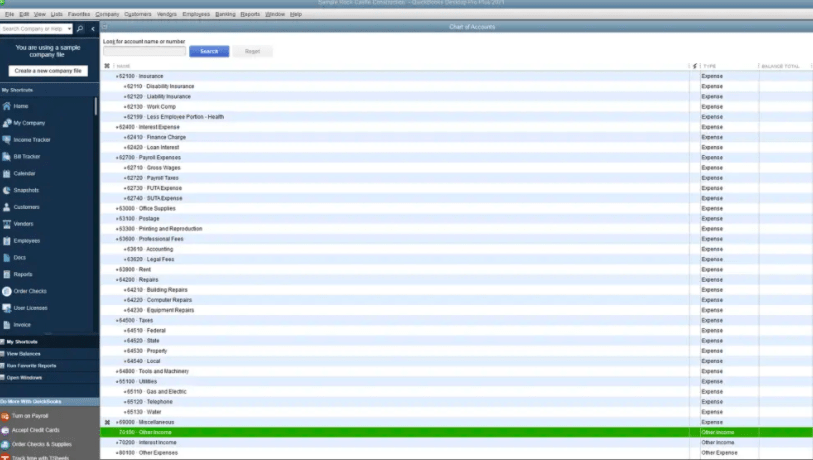
- Go to ‘Financial’, click on ‘Lists’, then select ‘Chart of Accounts.
- Choose ‘Account’, then select ‘Show Inactive Accounts’.
- An inactive account has an X mark against its name. Click on the X. Alternatively, right-click on the account name and select ‘Make Account Active’.
Run QuickBooks POS Financial Exchange and the error should be fixed now. In case the account has been deleted, you need to create a new one.
Contact QuickBooks POS Experts To Fix QuickBooks Error 140109
If error 140109 in QuickBooks still persists. Contact QuickBooks error support at +1800-994-0980 & get instant fixes for QuickBooks errors.


